Project SLIM
Project SLIM began as an idea well over a year ago... RandomEvilDoer just happened to have a spare, unused, Xbox Slim laying around... and I happened to have none. So began the nearly year long charade of trying to get the thing actually shipped out. But alas, after much wait, hype, and comic relief, it has finally arrived!
Project Scope
- ​Reset Glitch Hack (Trinity 4G Slim)
- Coolrunner Rev. C (CR3 is overkill for a Trinity, and unneeded)
- TX DemoN Dual Nand Installation
- QSB Post and JR/Nand-X/CR Boards
- DG-16D4S Laser Replacement
Objectives
- ​Dualboot Retail and FUSION/RGLoader
- Development Support
- Testbed for ISO modifications
Phase 1
Phase 1 simply consisted of evaluating the hardware to determine what all would be needed along the way and preparing for the eventual hardware modifications.
The first step was to identify the dashboard version:

Great! Being less than 14719 means I can avoid having to deal with a DGX board to obtain the CPU keys. I'll need to update the Dashboard to 14719 later when performing the install.
Testing the DVD proved futile, as I could audibly hear the disc slipping when the drive attempted to spin. As a result, disassembly became an immediate priority. For a much better guide on disassembly, I'd suggest this video:
Disassembling an Xbox 360 Slim
Now, we have our unshelled console.
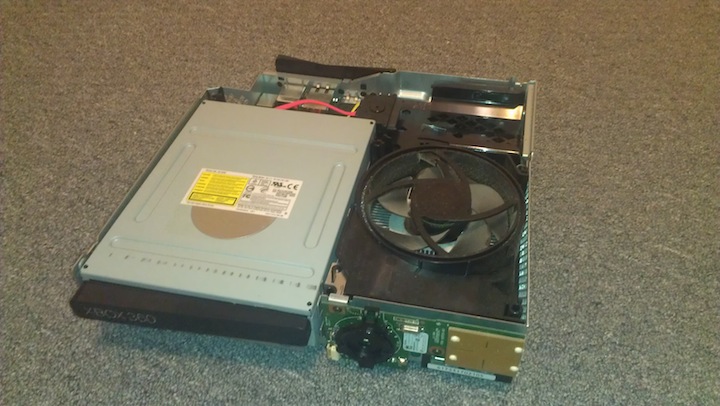
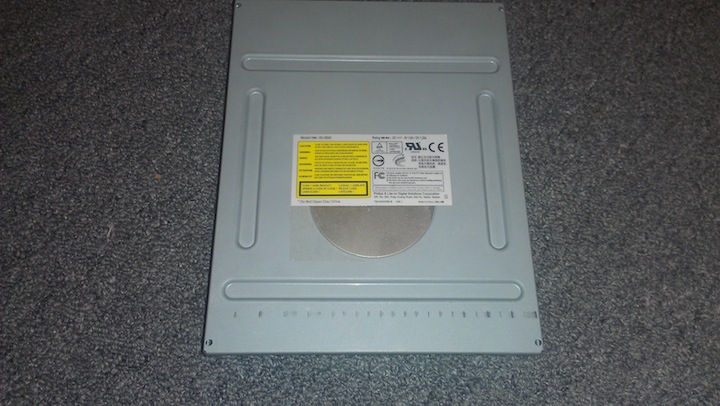
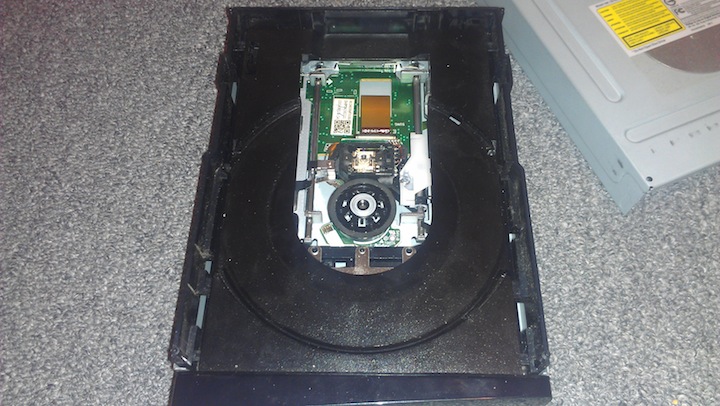
The next step was to disassemble the DVD drive, which was fairly straight forward. However, upon inspection my fears became reality that the drive had been tampered with.
You can see here that the firmware sticker is missing.
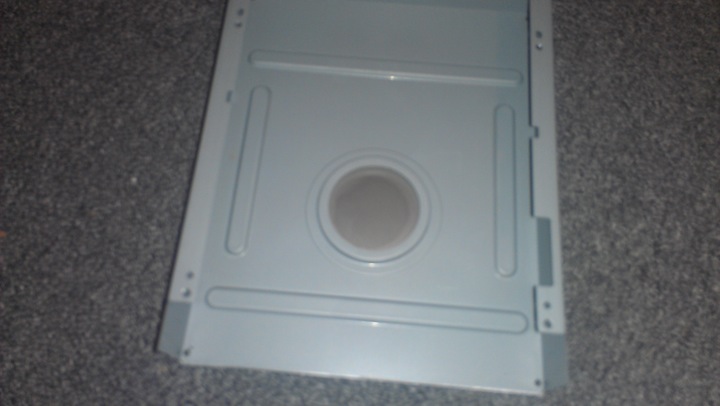
That's not all that is missing, so is the magnetic clamp to keep the disc secured while spinning! No wonder the disc was slipping. I had to track down a cover from ebay to replace the missing spindle!
After testing the laser, I discovered it also needed replacing. So, I ordered a G2R2 laser from e-bay for a respectable $6.25, and will be replacing that as soon as parts arrive.
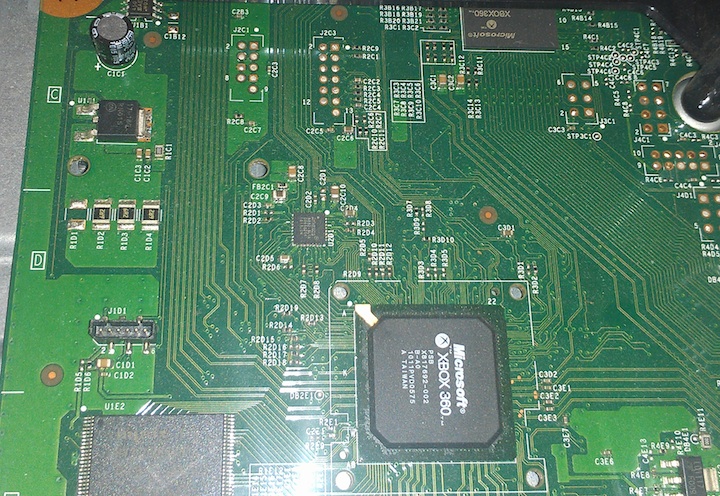
Lacking parts, I took the remaining time to analyze the board and inspect all of the hardware mounting and soldering points for both the Coolrunner and DemoN install. Everything looks original and unmolested!
Phase 2
Now that all of the equipment arrived I began the initial steps. Most of these don't have pictures, as they are fairly straight forward.
- Unbox everything, and make sure you have all of your wiring packages, quick solder boards, and everything else that is supposed to come with what you ordered.
- Connect a Micro-USB cable to the DemoN (make sure the switch is set to PC)
- Using either J-Runner or DemoN Toolbox, make sure you can read the NAND on the DemoN. This is done to make sure everything is operating correctly.
- Install the DemoN. There are some very good videos, particularly here: [TUT] TX DemoN install - Trinity Slim
Also, use the images included in J-Runner as a guide for wiring and solder points! - Once the DemoN is installed, plug the power supply into the motherboard, and connect to the Mini-USB port that connects via the ribbon cable to the DemoN (this should light up blue). Dump at least 2 copies of the NAND using J-Runner and verify that the NAND compare function states that the NAND's are the same.
If you are having trouble reading the NAND for any reason, very none of your solder points are shorting and that you are able to toggle between the Xbox 360 and DemoN NAND (Click Demon then TOGGLE NAND in J-Runner). If you get a 'Manufacturer Error FF' it is likely do to bridged solder pads. - BACKUP the nanddump1.bin files from the J-Runner output folder! Name these something to the effect of 'Original-NAND.bin' and do not lose these! Always copy and do not move!
- Now that you have your original NAND, connect the DemoN to the CoolRunner prior to soldering it to the board and flash the proper firmware via J-Runner
- Install the Coolrunner, be sure to solder a wire from the DemoN add-on board's EN pad to the EN pad on the CoolRunner!
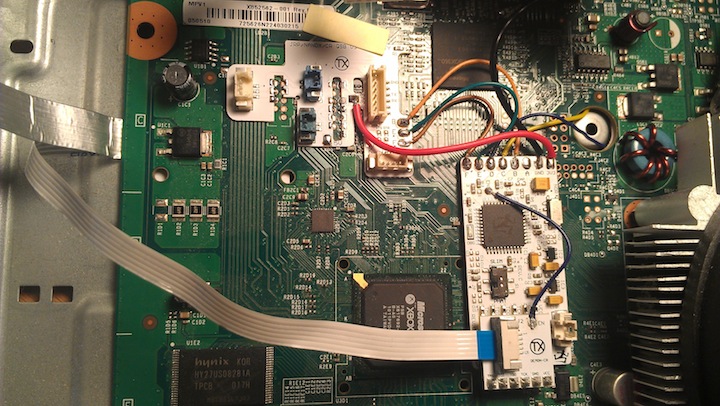
- Load a COPY of your Original NAND in J-runner and click Create ECC, then switch to the DemoN NAND and click Write ECC.
- Connect the 360 to your TV using analog output if you can, HDMI and HD outputs sometimes have issues and won't show up
If this is the case, you'll need to connect the network (wired) and scan the IP range for the 360 once XeLL loads - Boot the 360, making sure the blue DemoN led is on, and verify that the Coolrunner debug light (green) flashes at intervals. I find that on my SLIM it would be inconsistent intervals when set to SLIM, but glitches just fine.
- Wait for it to glitch and for XeLL to boot.
- Write down your CPU ID & DVD ID
- Load a copy of your original NAND and enter in the CPU ID, J-Runner should confirm it was correct
- Select the ideal dashboard you wish to build, make sure glitch is selected, then build a RGH firmware
- Write the firmware to the DemoN NAND
- You should be all finished! The box should now boot into a patched dashboard.
Troubleshooting
There are number of potential issues along the way that can cause all kinds of grief.
Some common sense tips:
Use flux
Use only as much solder as is needed, it is far too easy too use too much and short contacts
Tape or glue wires down that are soldered directly to the board to avoid ripping out pads
DemoN Troubleshooting
If the DemoN is unresponsive, make sure that the switch is set to XBX. Also, verify that you have all of your wires and quick solder points soldered down. They are easy to miss! If this still doesn't work, check with a multimeter for power at the DemoN board. Then check all of your solder points to verify they aren't shorting with any other pads. If you are having trouble reading the nand, you likely have an issue with the QSB points that are all in a row. Other than that, there's little that can mess up or cause problems with the DemoN. Once it is soldered correctly, it pretty much works or doesn't.
Coolrunner Troubleshooting
The CoolRunner can be extremely frustrating. Start by making sure the switch is in the 'NOR' mode. Then, verify the red light comes on whenever power is applied to the unit (usually standby power should turn it on). Next, try to identify if it is attempting to glitch or not. If you power on, and you never see the green debug led flash and the xbox doesn't make the tell-tale fan stuttering sign, chances are the CR isn't attempting to glitch. Verify that you are booting from the DemoN NAND and not the 360 NAND, unless you have removed the EN wire from the coolrunner. If you are still having problems, verify all solder points and try to route the blue (D) wire away from any coils, ground, or power wiring. I had to run mine back over the board towards the center of the CR to avoid interference for the best glitch results.




 Back to top